Full-stack Next.js with Nhost and Hasura
27 February 2021


This is the first post in a series of posts documenting my journey building Botler - your personal AI butler. In this post, I scaffold the initial application used to configure the bot according to the user's needs. In subsequent posts, we will go over some more complex features adding functionality to the bot itself.
A couple of prerequisites before we start. The assumption is that you know and have worked with React before, and it will also help if you at least had a basic idea of what Hasura is and what it does for us. In this post/tutorial, we use:
- Next.js - To generate and build our React application with TypeScript. It's okay if you haven't worked with Next or TypeScript before. If you know and understand React, this post should be very easy to follow. You can also use plain old JS and/or React (without Next) by making some small changes along the way.
- Nhost - We will be using Nhost for basically everything else. Creating a project on Nhost automatically sets up and deploys a Hasura instance which gives us a PostgreSQL database and GraphQL APIs. On top of this, you also get authentication (with social providers), storage, and serverless functions right out of the box.
Also, this is probably going to be another huge post and huge posts can be overwhelming. If you get stuck somewhere, take a step back and read through the section again and you'll probably figure it out. If you're still stuck, feel free to reach out to me on Twitter and I'll respond as soon as possible.
And now that we finally have everything out of the way, let's build this.
Setting up a Next.js application
Let's start by setting up our Next app. There are several ways to do this but I think the easiest is to use the create-next-app CLI to scaffold the application with everything set up. By default, it uses the base template but you can use any of the official examples as starting points. My personal favorite is this one with TypeScript, ESLint, Prettier and Jest (with React testing library) already configured but feel free to use any of them.
_10npx create-next-app --example with-typescript-eslint-jest web-app
 Creating a Next.js app
You should now have a Next app set up with whatever template you decided to go with. You can simply cd into it and run yarn dev to have your app running at http://localhost:3000/.
Adding TailwindCSS (Optional)
This step is optional (but recommended) but I add Tailwind to every single project I build. It comes with some great utility classes and really speeds up the initial development. Their guide for setting up Tailwind with Next is pretty straightforward and should be very easy to follow. I am also using the tailwindcss-forms plugin that they provide.
Configuring absolute imports (Optional)
Another optional (but recommended) thing I do in all my projects is set up absolute imports. Next makes this very easy by allowing you to do this in your jsconfig.json or tsconfig.json based on which way you went. The snippet is what mine looks like after configuring absolute imports and here is a link to the Next docs for the same.
_25{_25 "compilerOptions": {_25 "baseUrl": ".",_25 "paths": {_25 "@pages/_": ["pages/_"],_25 "@components/_": ["components/_"],_25 "@lib/_": ["lib/_"]_25 },_25 "target": "es5",_25 "lib": ["dom", "dom.iterable", "esnext"],_25 "allowJs": true,_25 "skipLibCheck": true,_25 "strict": false,_25 "forceConsistentCasingInFileNames": true,_25 "noEmit": true,_25 "esModuleInterop": true,_25 "module": "esnext",_25 "moduleResolution": "node",_25 "resolveJsonModule": true,_25 "isolatedModules": true,_25 "jsx": "preserve"_25 },_25 "exclude": ["node_modules", ".next", "out"],_25 "include": ["next-env.d.ts", "**/*.ts", "**/*.tsx", "**/*.js"]_25}
Setting up Nhost and Hasura
Now that we have our frontend application set up, let's take care of setting up our database, APIs, and authentication using Nhost.
Create an account (if you don't already have one) and then click the create project button to set up a new project. Add a name and a URL for your project and then select the trial plan. For the location, I generally just go with whatever region is closest to me (or to most of my users) and use that as a starting point. Once you enter all the details and click the button, Nhost should start creating your project. The flow is pretty quick and took about 90 seconds for me. You should now be able to click the Go to project button to view your project.
 Creating a new project on Nhost
The project dashboard might be a bit overwhelming with all the options listed there but don't worry too much about it for now. We're going to go over all of them one by one when we use them within our app. Something really cool to note though is that by simply creating a new project, we already have a database and GraphQL APIs set up with Hasura along with authentication and storage.
The next thing we want to do is set up the Nhost CLI to work with our app locally. We can start by globally installing the CLI.
_10npm install -g nhost
Once that's done, we would need to log in to the CLI and initialize our project. After the initialization is complete, we should be able to run everything Nhost provides in our development environment.
_10nhost login_10_10# Make sure you run this in the root directory of your project_10nhost init_10_10# Starts all four development servers_10nhost dev
A few things to note here:
- I got an error when running nhost init because I didn't have the Hasura CLI installed. If you see the same error, you can install the Hasura CLI through NPM by following the instructions here.
- The next error I saw was when I tried to run nhost dev but I wasn't running Docker on my local machine. Turning Docker back on fixed this issue so if you don't already have Docker (and Docker Compose), you'd want to set those up as well before locally developing with Nhost.
- If you run into any other issues, the CLI is open source so feel free to visit the repository and create an issue asking for help.
Once I successfully ran all the commands, I had all 4 services up and running and the Hasura console automatically open in a new tab.
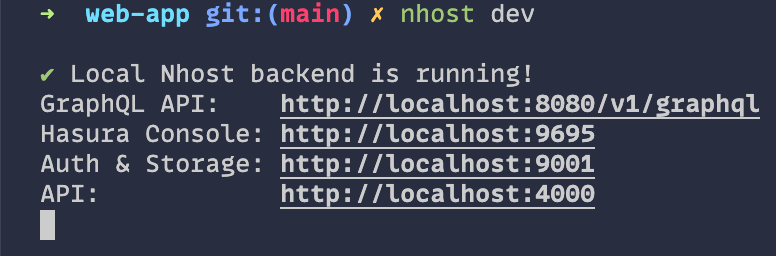 Nhost ClI running
Again, four different APIs and a lot of stuff present in the Hasura console but don't worry about any of it yet. We'll get to some of it in the next section itself!
Connecting our Next app to Hasura using Nhost
So far, we have individually set up our Next app, our database, and our APIs. There's really no point doing all this if they're all separate and can't talk to each other so let's fix that. In this section, we'll add a few libraries and connect our Next app to our Hasura instance using the endpoints provided by Nhost.
_10yarn add @nhost/react-apollo @apollo/client graphql graphql-tag
Now that we have installed these packages, we want to use the NhostApolloProvider from the @nhost/react-apollo package to communicate with Nhost. We can do that by wrapping our app with the provider and passing it our GraphQL endpoint.
_11import 'tailwindcss/tailwind.css'_11import type { AppProps } from 'next/app'_11import { NhostApolloProvider } from '@nhost/react-apollo'_11_11const MyApp = ({ Component, pageProps }: AppProps) => (_11 <NhostApolloProvider gqlEndpoint={process.env.NEXT_PUBLIC_GRAPHQL_URL}>_11 <Component {...pageProps} />_11 </NhostApolloProvider>_11)_11_11export default MyApp
Replace the contents of your _app.tsx file (you may have to create it, you can read more about the custom app with Next.js here) with the above snippet. The gqlEndpoint comes from an environment variable. We do this because we want the URL to be different when we're in our development environment vs. when we're in production.
When we set up Nhost locally, it created a .env.development file for us. We can open that file and add our new environment variable there. Below is a snippet of what it should look like once we've done that.
_10language="yaml"_10_10REGISTRATION_CUSTOM_FIELDS=display_name_10NEXT_PUBLIC_GRAPHQL_URL=http://localhost:8080/v1/graphql
Believe it or not, that's all we had to do to get our Next app to talk to our Hasura instance. We don't have to fiddle with any ApolloClient configuration because @nhost/react-apollo takes care of that for us. We can't really test this yet as we don't have any data in our database so let's fix that in the next section.
Authentication with Nhost
To help set up authentication with Nhost within our Next app, we will be installing two more packages. nhost-js-sdk will help us interact with Nhost's auth and storage and @nhost/react-auth will give us a provider to wrap our app with so we always have access to the auth data.
_10yarn add nhost-js-sdk @nhost/react-auth
Let's now configure these libraries so we can use them within our app.
_14import nhost from 'nhost-js-sdk'_14_14const config = {_14 /*_14 Again, this value comes from an environment variable_14 as mentioned above. In development, I've set the value_14 to http://localhost:9001_14 */_14 base_url: process.env.NEXT_PUBLIC_BACKEND_URL,_14}_14_14nhost.initializeApp(config)_14_14export const auth = nhost.auth()
_16import 'tailwindcss/tailwind.css'_16_16import type { AppProps } from 'next/app'_16import { NhostApolloProvider } from '@nhost/react-apollo'_16import { NhostAuthProvider } from '@nhost/react-auth'_16_16import { auth } from '@lib/nhost'_16_16const MyApp = ({ Component, pageProps }: AppProps) => (_16 <NhostAuthProvider auth={auth}>_16 <NhostApolloProvider gqlEndpoint={process.env.NEXT_PUBLIC_GRAPHQL_URL}>_16 <Component {...pageProps} />_16 </NhostApolloProvider>_16 </NhostAuthProvider>_16)_16export default MyApp
Basically, in the first snippet, we configure and initialize the auth function in the nhost-js-sdk, and in the next snippet, we pass it to the NhostAuthProvider so we can check the auth status throughout our application.
Now that everything is set up (for real this time), let's create a new page where our users can log in to the app.
A small caveat, Next creates a route for you whenever you create a new file in the pages directory. If you aren't using Next, you'd probably want to use something like React Router at this point.
_89import { useState } from 'react'_89import Link from 'next/link'_89import { useRouter } from 'next/router'_89_89import { auth } from '@lib/nhost'_89_89const Login = () => {_89 const router = useRouter()_89 const [email, setEmail] = useState('')_89 const [password, setPassword] = useState('')_89_89 const handleSubmit = async (e: React.FormEvent<HTMLFormElement>) => {_89 e.preventDefault()_89_89 try {_89 await auth.login(email, password)_89 router.push('/')_89 } catch (error) {_89 console.error(error)_89 }_89 }_89_89 return (_89 <section className="flex h-screen flex-col items-center justify-center space-y-5 bg-indigo-900">_89 <div className="rounded-none bg-white px-5 py-8 shadow-xl sm:w-10/12 sm:rounded-lg md:w-8/12 lg:w-6/12 xl:w-4/12">_89 <h1 className="mb-5 text-left text-lg font-semibold text-gray-900">_89 Log in to your account_89 </h1>_89 <form className="space-y-5" onSubmit={handleSubmit}>_89 <label className="block">_89 <span className="mb-1 block text-sm font-medium text-gray-700">_89 Your Email_89 </span>_89 <input_89 className="mt-1 block w-full rounded-md border-gray-300 shadow-sm focus:border-indigo-300 focus:ring focus:ring-indigo-200 focus:ring-opacity-50"_89 type="email"_89 placeholder="farazpatankar@gmail.com"_89 required_89 value={email}_89 onChange={(e) => setEmail(e.target.value)}_89 />_89 </label>_89 <label className="block">_89 <span className="mb-1 block text-sm font-medium text-gray-700">_89 Your Password_89 </span>_89 <input_89 className="mt-1 block w-full rounded-md border-gray-300 shadow-sm focus:border-indigo-300 focus:ring focus:ring-indigo-200 focus:ring-opacity-50"_89 type="password"_89 placeholder="••••••••"_89 required_89 value={password}_89 onChange={(e) => setPassword(e.target.value)}_89 />_89 </label>_89 <button_89 type="submit"_89 className="group relative flex w-full justify-center rounded-md border border-transparent bg-indigo-800 px-4 py-2 text-sm font-medium text-white hover:bg-indigo-900 focus:outline-none focus:ring-2 focus:ring-indigo-500 focus:ring-offset-2"_89 >_89 <span className="absolute inset-y-0 left-0 flex items-center pl-3">_89 <svg_89 xmlns="http://www.w3.org/2000/svg"_89 viewBox="0 0 20 20"_89 fill="currentColor"_89 className="h-5 w-5 text-indigo-500 group-hover:text-indigo-400"_89 >_89 <path_89 fillRule="evenodd"_89 d="M5 9V7a5 5 0 0110 0v2a2 2 0 012 2v5a2 2 0 01-2 2H5a2 2 0 01-2-2v-5a2 2 0 012-2zm8-2v2H7V7a3 3 0 016 0z"_89 clipRule="evenodd"_89 />_89 </svg>_89 </span>_89 Sign in_89 </button>_89 </form>_89 </div>_89 <div className="text-center text-sm text-gray-400">_89 <Link href="/forgot-password">_89 <a className="text-indigo-200 underline hover:text-white">_89 Forgot password_89 </a>_89 </Link>_89 </div>_89 </section>_89 )_89}_89_89export default Login
So that's a lot of code and kind of a big snippet but you only really care about the handleSubmit function. I attached the whole file because I didn't want to share an incomplete example. To log our users in, we ask them for their email and password and then call the auth.login function that we get from the Nhost JS SDK.
Currently, when we try to log in, we will get an error because we don't have any users. So let's go ahead and create one using the /auth/register API by making a CURL request to it.
_10curl --header "Content-Type: application/json" \_10 --request POST \_10 --data '{"email":"farazpatankar@gmail.com","password":"password"}' \_10 http://localhost:9001/auth/register
localhost:9001 is where the Auth and Storage server runs and /auth/register is the endpoint for creating a new user. I created one with my email, you can simply replace it with your own. Once we do this, we should be able to log in using the component we just created.
 Login flow
As you can see in the GIF above, we create a user using the CURL command I shared and then go back to our app and try to sign in. Our app then redirects us to the home page because that's what we've written in our handleSubmit function.
If you go ahead and open the Hasura console in your local environment, you'll notice that the user has been created there as well.
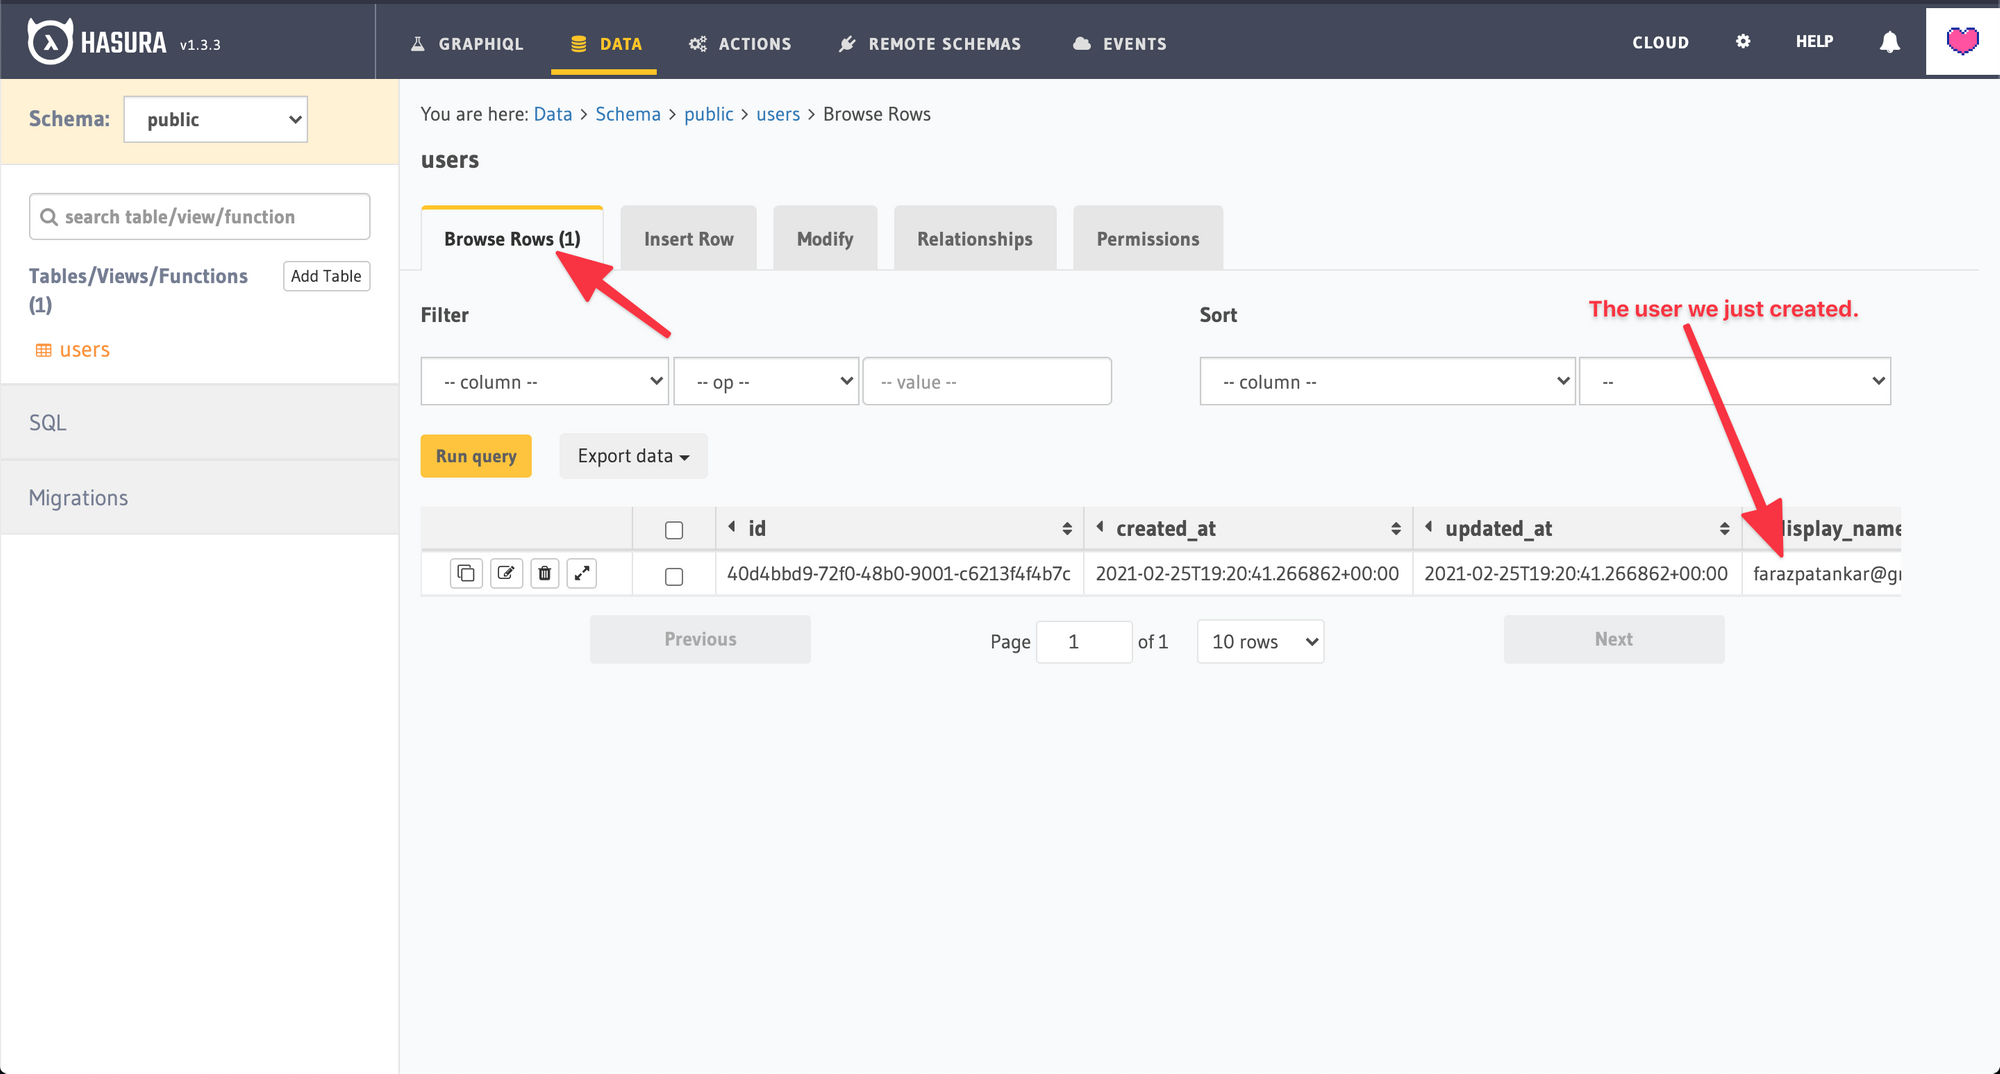 Hasura console
Let's also go ahead and update the code on our home page to accurately show the users' session status.
_32import Link from 'next/link'_32import { useAuth } from '@nhost/react-auth'_32_32import { FullPageSpinner } from '@components/common/spinner'_32_32const Home = () => {_32 const { signedIn } = useAuth()_32_32 if (signedIn === null) return <FullPageSpinner />_32_32 return (_32 <div className="flex h-screen w-full flex-col items-center justify-center">_32 {!signedIn ? (_32 <h1 className="mb-3 text-4xl font-bold text-purple-900">_32 Thanks for logging in!_32 </h1>_32 ) : (_32 <>_32 <h1 className="mb-3 text-4xl font-bold text-purple-900">_32 Hello from Botler_32 </h1>_32 <Link href="/login">_32 <a className="flex rounded-md border border-transparent bg-indigo-800 px-4 py-2 text-sm font-medium text-white hover:bg-indigo-900 focus:outline-none focus:ring-2 focus:ring-indigo-500 focus:ring-offset-2">_32 Login_32 </a>_32 </Link>_32 </>_32 )}_32 </div>_32 )_32}_32export default Home
If you go through the snippet above, you'll notice that we're using the useAuth hook from @nhost/react-auth. This hook tells us whether the user is signed in or not. If the value of signedIn is null, it means that the hook is still trying to figure out whether or not the user is signed in. In that case, we show a spinner, and once we figure out the status, we show the content accordingly.
The GIF below demonstrates the flow mentioned above.
 Full Sample Login Flow
Deploying
If the existing features weren't enough, Nhost also has an excellent GitHub integration. If you connect your repository to the Nhost console, Nhost automatically deploys your changes whenever you push to the master or the main branch. You can also do deployments manually using the nhost deploy command. Here's a link to the docs for the same.
As for the Next.js app, you can deploy it to Vercel using the instructions mentioned here. Just make sure you add the proper environment variables to your project on Vercel; otherwise, things do not work as expected. So far, those would be the NEXT_PUBLIC_GRAPHQL_URL and the NEXT_PUBLIC_BACKEND_URL. You can find both these URLs in your Nhost dashboard.
On my end, I have integrated GitHub with both Vercel and Nhost. That way, whenever I push to my main branch, both services deploy automatically.
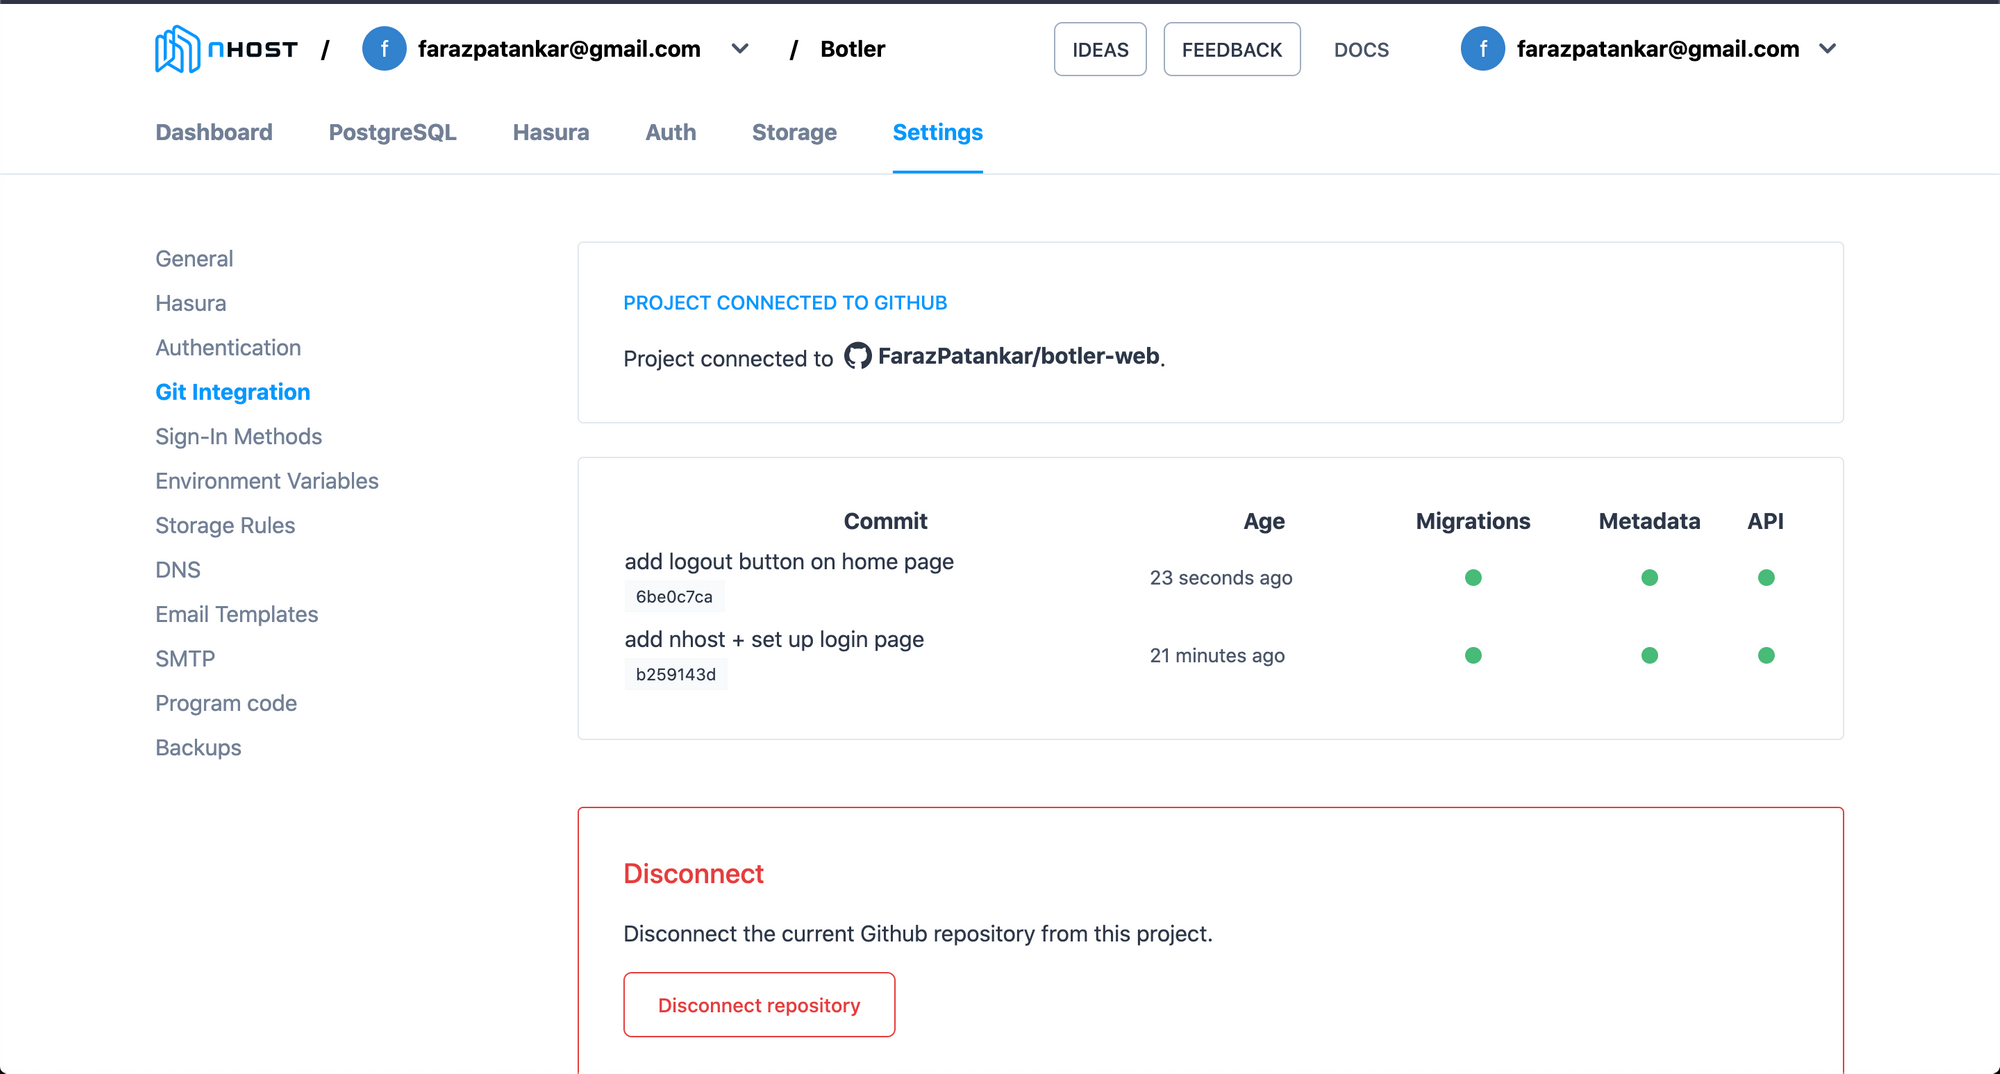 Nhost Deployments
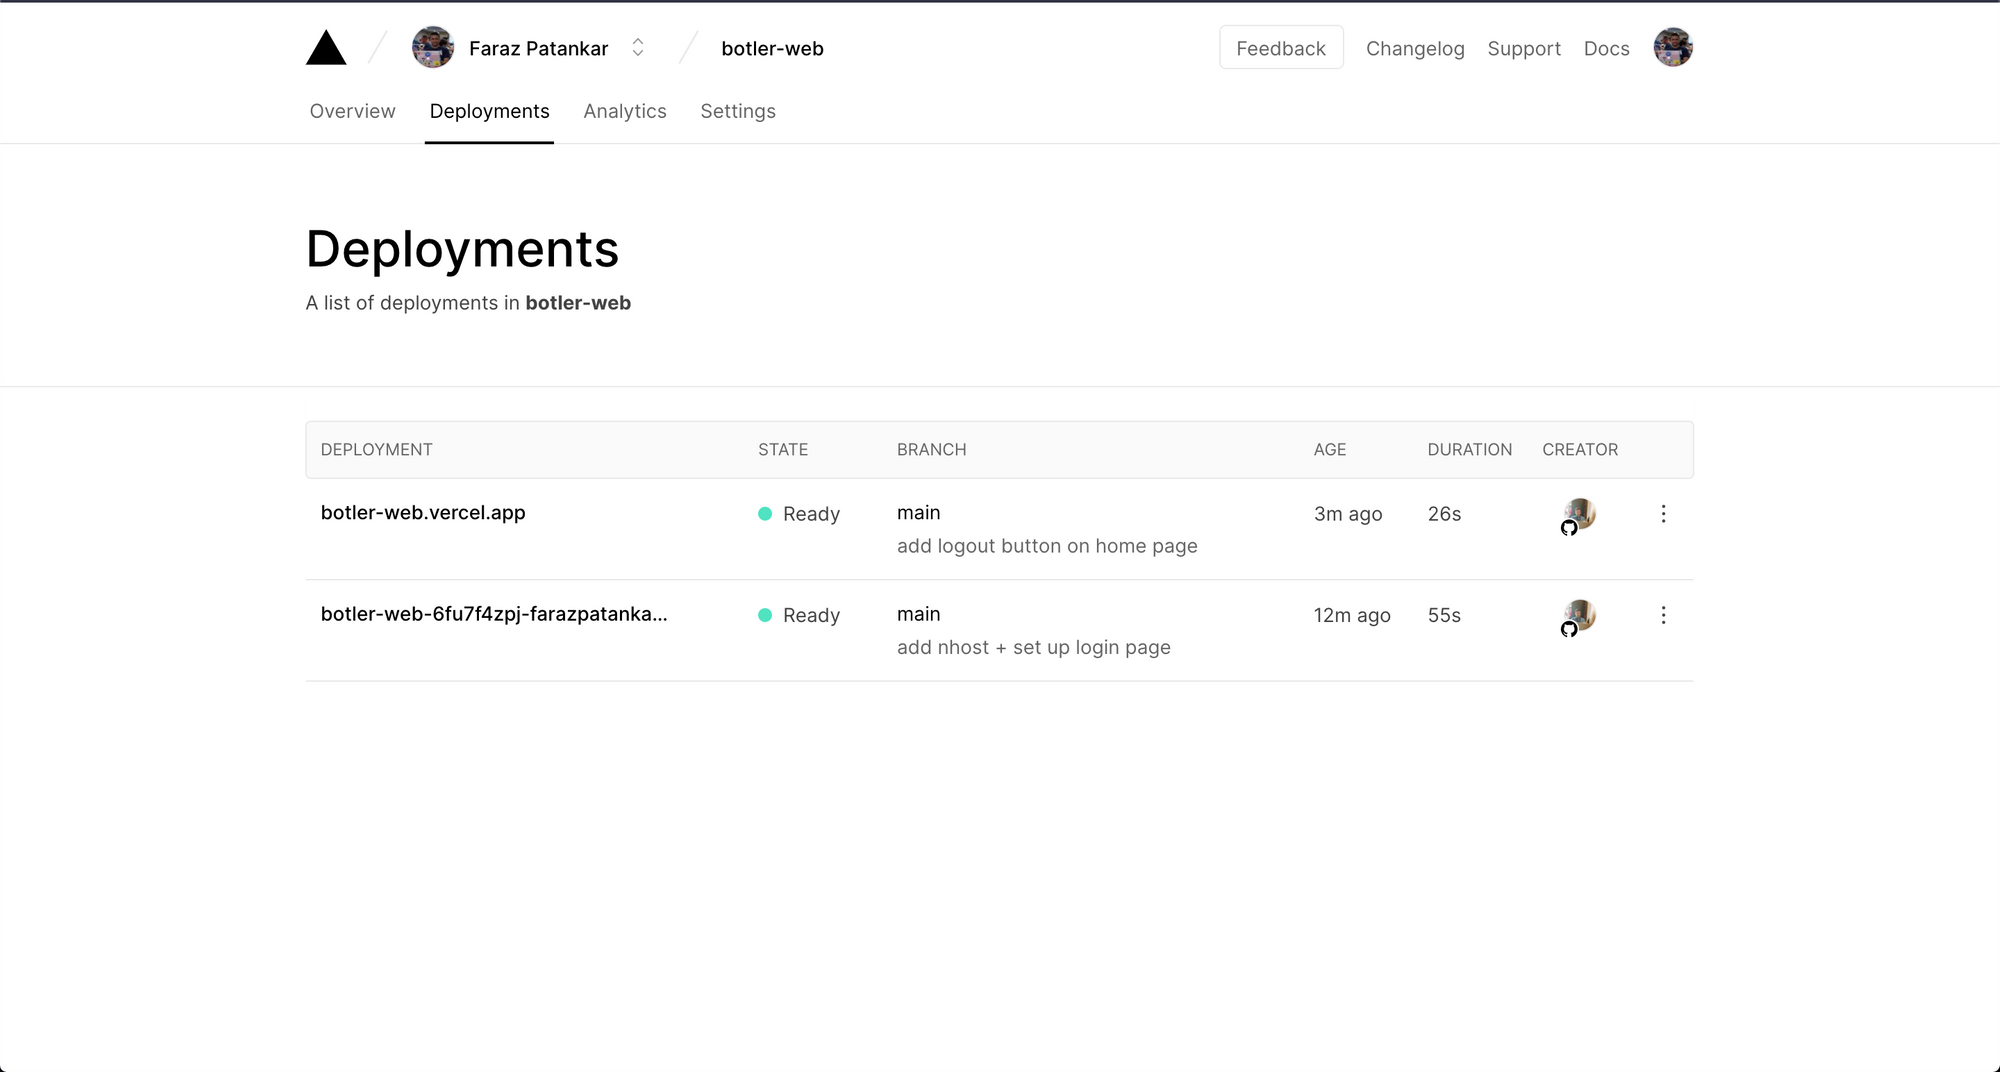 Vercel Deployments
A few notes
- We didn't build the registration flow. The reason for that is, I want to keep the platform invite-only for the time being. So the idea is, I add users manually, and then they can log in and configure everything they want to. You probably want to allow your users to sign up and to do that, you can refer to this example (specifically this file) by the Nhost team. You can also view all the available methods in the docs here.
- We didn't do any error handling. Yep, not in this demo we didn't. But, we probably will in subsequent posts as and when we make the product more production-ready. I can see this turning into a pretty complicated app by the time we're done.
- If you want to check the flow live, you can visit this URL. I have created a dummy user that you can log in with. The email is test@email.com and the password is password.
Closing
Well, that was quite a long post, wasn't it? But look at how much we achieved! We set up a NextJS app, a PostgreSQL database and GraphQL API using Hasura, authentication and storage using Nhost and we are already allowing people to log in to our app. We also have fully functional development and production environments along with automated deployments!
Let me know what you think about the article and if you have any feedback at all here. You can also tweet at me with any questions/issues you may run into while trying to build this and I'll try and respond as soon as possible.
Oh, and please keep an eye out for the follow-up posts as I am going to try and document the whole journey of building this!
Share this post